Power on & shut down
Excerpted from the supplied English User Manual v1.4. Chinese editorial corrections and later confirmations may not be synchronized. Check the Chinese reference where the two differ.
Configuration: dual-arm details apply only to dual-arm/mobile dual-arm robots. Older instructions differ in power timing, light names and homing motion; check the operational guidance and version notes on this page.
3.3 Dual-Arms/Mobile Dual-Arms Robot Power-On/Off Procedure
Power-On Procedure
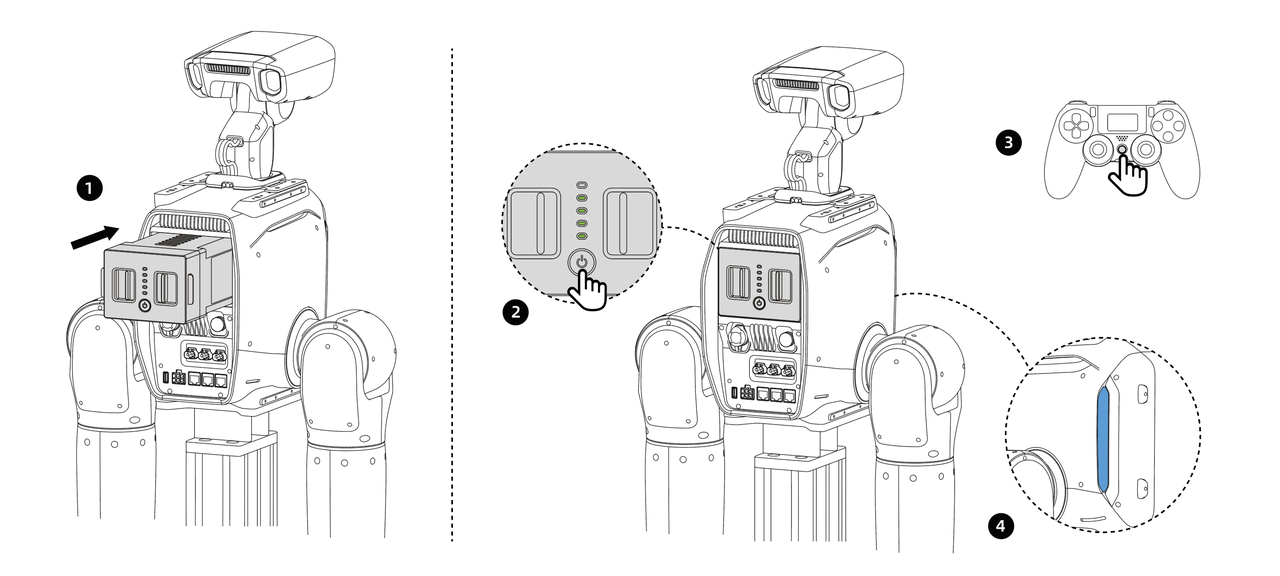
- Complete robot installation according to the installation procedure and wait for startup.
- Insert a fully charged battery into the battery compartment and press until the latch locks. For the fixed-stand version, connect the power adapter to the external power interface and to 220 V power before startup. For the mobile base version, turn on the power switch at the rear of the base.
- Short-press for 0.5 s, then long-press the robot Power button for 3 s to start the robot. The battery level indicator will turn on.
- Long-press the remote controller power button for 2 s to turn it on. The display will light up and show information.
- Observe the status indicator. During startup, it flashes white. After about 20 s, it changes to steady Blue/Cyan/Green, indicating startup is complete.
- Check the signal indicator on the remote controller display. If a signal is shown, pairing has succeeded and startup is complete.
Tip: The robot can start normally only after the head is installed and the head joint power cable and joint communication cable are connected.
Power-Off Procedure
- To stop robot motion, press
L1+Xsimultaneously in remote-control mode to enter idle state. All joint motors enter torque-damping state and will slowly move downward. - For the fixed-base version, unplug the external power interface. For the mobile base version, turn off the power switch at the rear of the base.
- Short-press for 0.5 s, then long-press the robot Power button for 3 s to power off. The battery level indicator and status light will turn off.
- Long-press the remote controller power-off button for 3 s to power off. The display will turn off.
Tip: Note: Enter idle state first and allow the joint motors to return slowly. If the power-off button is pressed directly, the joints will drop immediately and may damage the robot.
3.4 Sole/Wheeled Robot Power-On/Off Procedure
Power-On Procedure
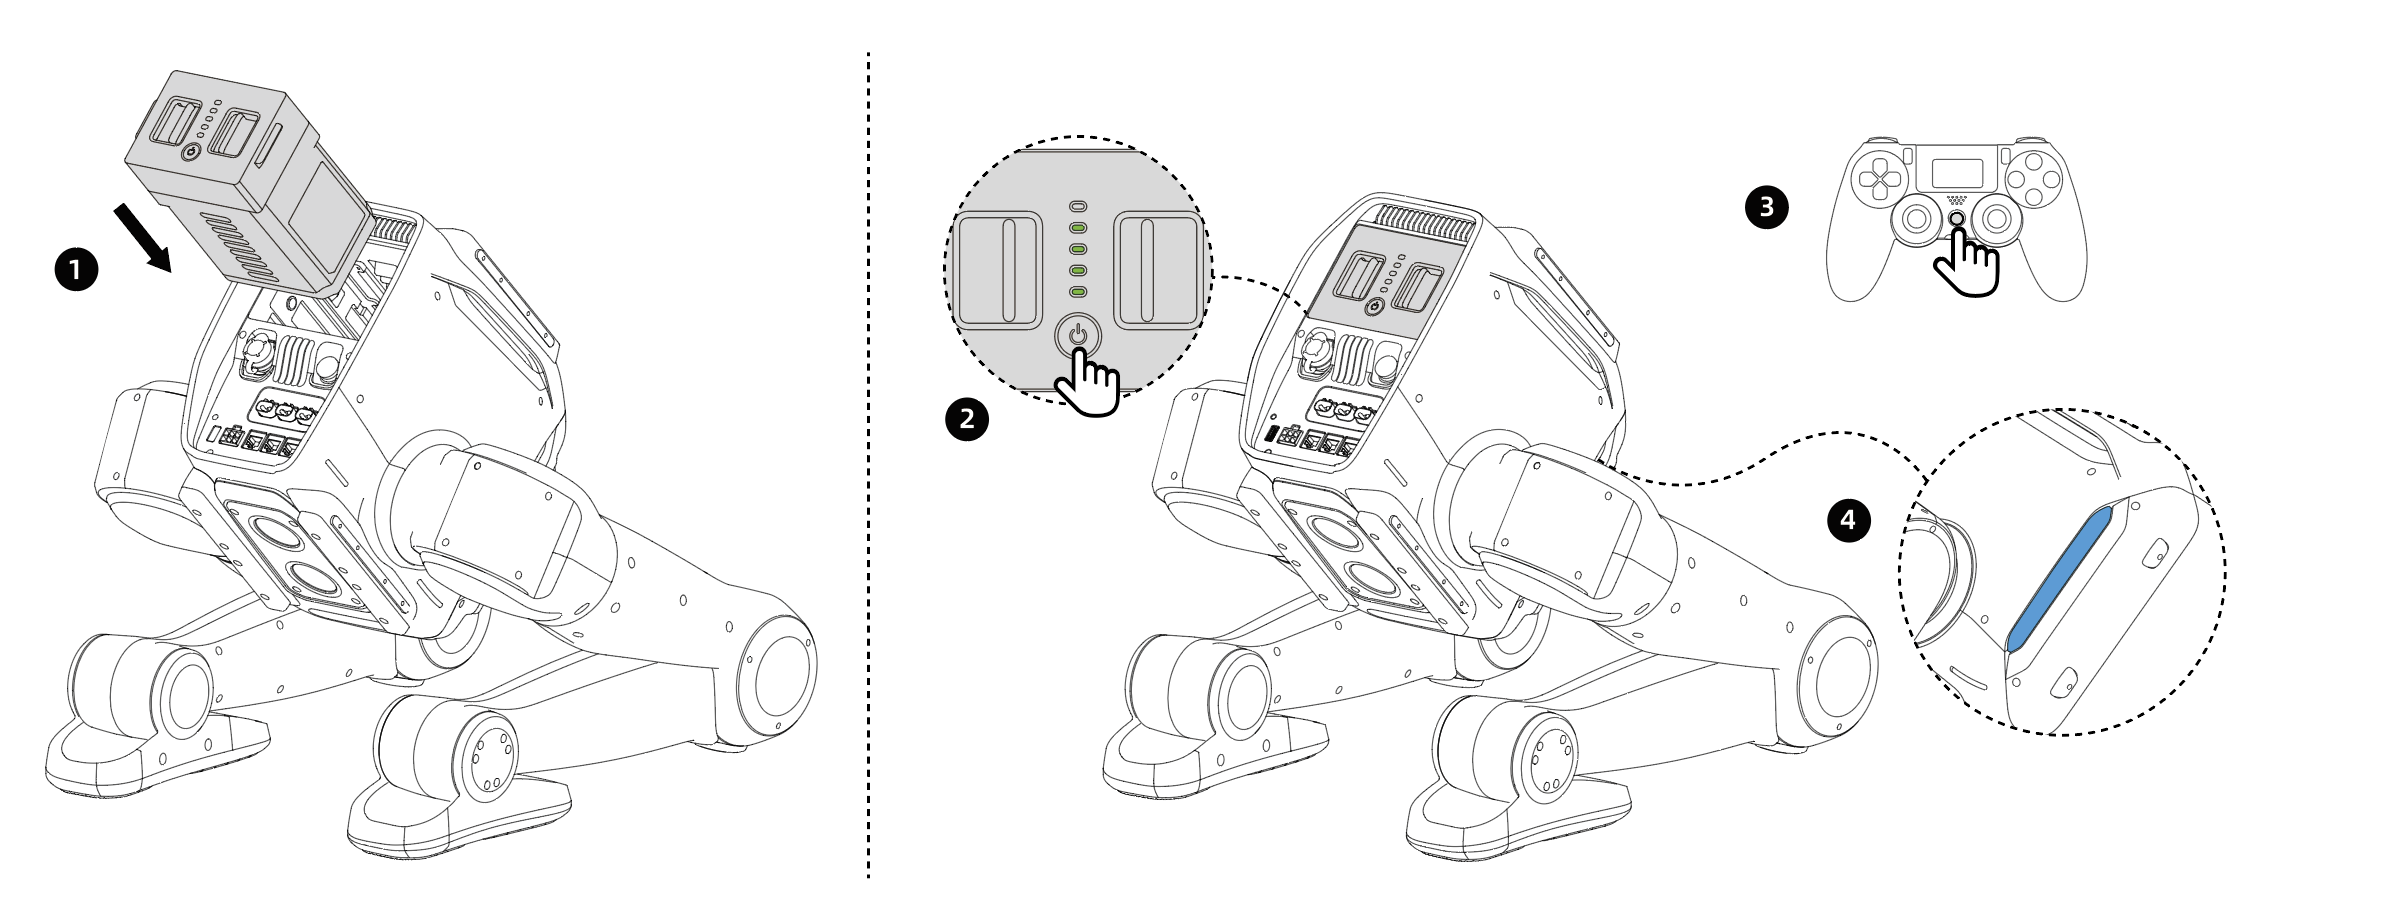
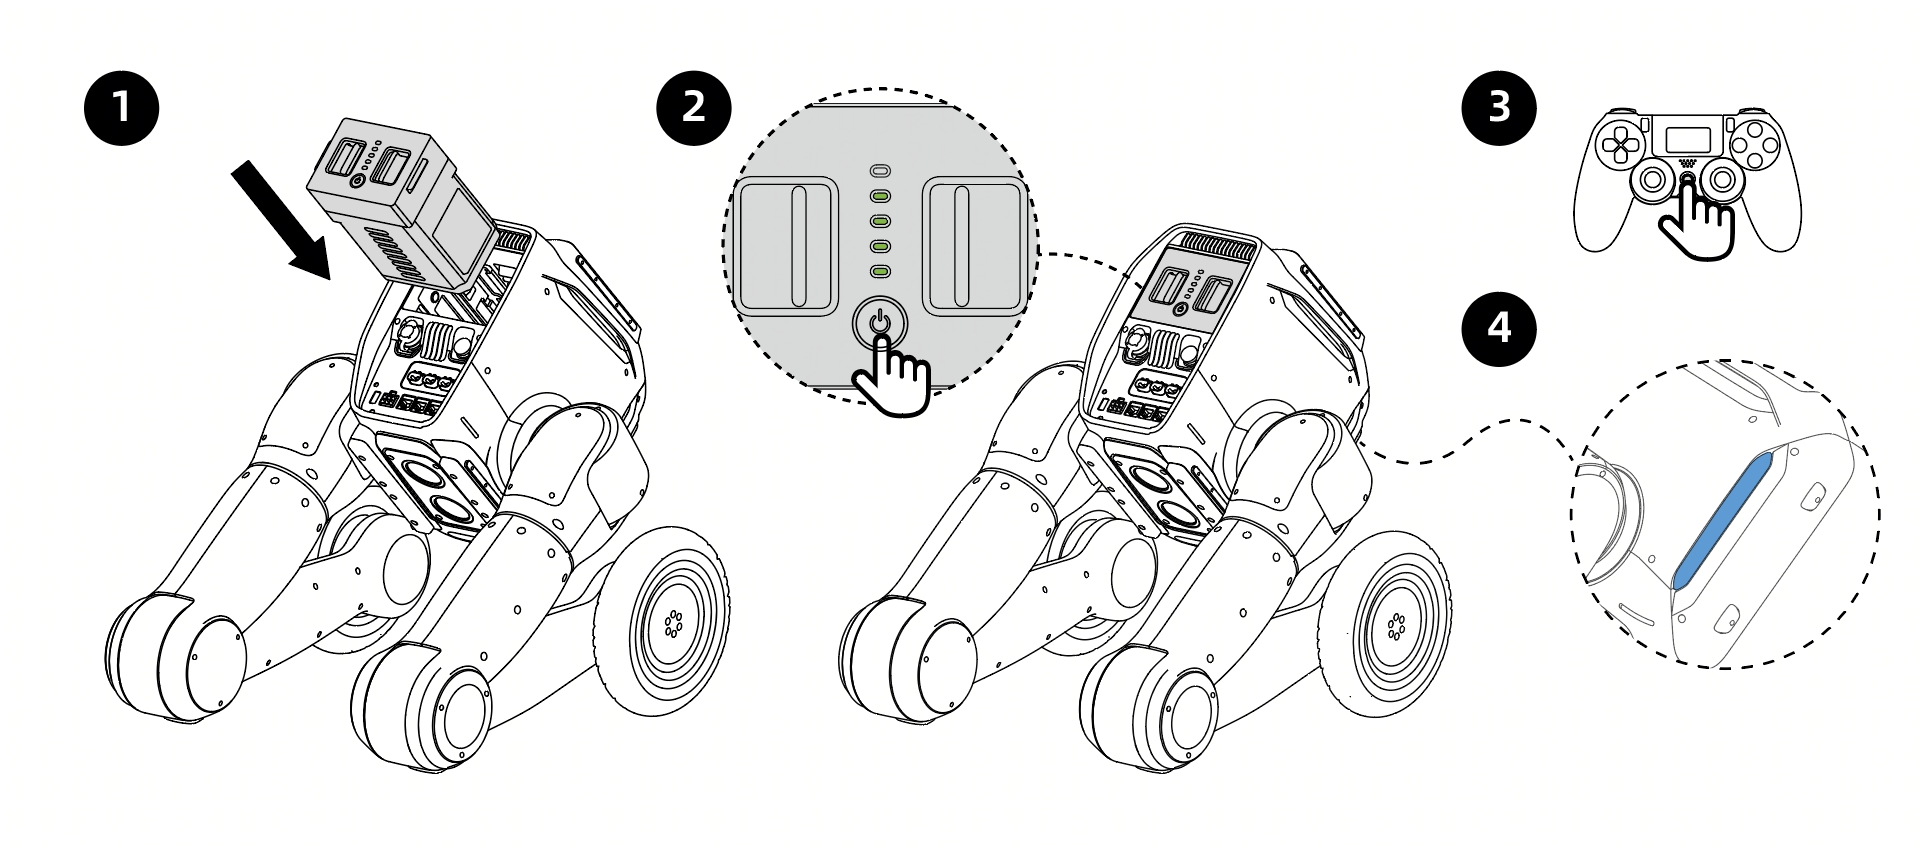
- Before powering on, place the robot in the position shown and keep it self-balanced.
- Insert a fully charged battery into the battery compartment and press until the latch locks.
- Short-press for 0.5 s, then long-press the robot Power button for 3 s to start the robot. The battery level indicator will turn on.
- Long-press the remote controller power button for 2 s to turn it on. The display will light up and show information.
- Observe the status indicator. It flashes white during startup, and steady blue indicates startup is complete.
- About 20 s after startup, the body status indicator changes from white to steady Blue/Cyan/Green. Check the signal indicator on the remote controller display. If a signal is shown, pairing has succeeded and startup is complete.
Power-Off Procedure
- To stop robot motion, press
L1+Xsimultaneously in remote-control mode to enter squat state and let the device land stably. - Long-press the robot power-off button for 3 s to power off. The battery level indicator and status light will turn off.
- Long-press the remote controller power-off button for 2 s to power off. The display will turn off.
- After all indicators turn off, remove the battery.
Dual-arm configuration details · 3.3.1 Power-On Procedure
- Assemble the robot according to the installation procedure.
NOTICE: Install the robot head and connect the head-joint power and communication cables before powering on the robot.
- Insert a fully charged battery into the battery compartment and press until the latch locks. For the Fixed-stand version, connect the Power Adapter to the External Power Supply Port, then connect it to an AC outlet that meets the input rating marked on the Power Adapter. For the Mobile Dual-Arms Version, turn on the power switch at the rear of the Mobile Base.
- Short-press the robot Power Button for 0.5 seconds, then press and hold it for 3 seconds. The Battery Level Indicator turns on.
- Press and hold the Remote Controller power button for 2 seconds. The display turns on.
- Check the Status Indicator. It flashes white during startup. After approximately 20 seconds, it remains steady blue or green, indicating that startup is complete.
- Check the signal icon on the Remote Controller display. A visible signal confirms successful pairing and completes the startup procedure.
Dual-arm configuration details · 3.3.2 Power-Off Procedure
- To stop robot motion, press L1+X simultaneously in Remote-Control Mode to enter Idle. All joint motors enter torque-damping state and slowly move downward.
- For the Fixed-stand version, disconnect the External Power Supply Port. For the Mobile Dual-Arms Version, turn off the power switch at the rear of the Mobile Base.
- Short-press the robot Power Button for 0.5 seconds, then press and hold it for 3 seconds. The Battery Level Indicator and Status Indicator turn off.
- Press and hold the Remote Controller power button for 3 seconds. The display turns off.
NOTICE: Enter Idle first and allow the joint motors to return slowly. Powering off the robot directly may cause the joints to drop and damage the robot.